Choosing a glass railing system comes down to five decisions made in order: the system type, the glass, the hardware, what code requires where it’s going, and the budget. The system type is the one that matters most, because it sets how much hardware you see and roughly what the job costs per foot. Everything after that is easier once it’s settled.
Installed glass railings run from about $120 to $450 per linear foot in the Bay Area depending on which system you pick. Below is how to work through each decision without getting lost in product catalogs.
Decision 1: Which Glass Railing System
There are five glass railing systems in common use, and they differ mainly in how the glass is held. That single difference decides how open the view reads, how much metal you look at, and where the price lands.
| System | How it mounts | View | Cost per linear foot | Best suited to |
|---|---|---|---|---|
| Post-supported | Glass panels set between vertical posts | Segmented by posts | $120 to $200 | Long runs and tighter budgets |
| Semi-frameless | Minimal top or side framing with clamps between | Mostly open | $125 to $250 | A near-frameless look for less |
| Standoff / spigot | Individual stainless fittings hold each panel | Fully open | $175 to $325 | A lighter, more architectural look |
| Base shoe | Continuous aluminum channel anchored to the deck or slab | Fully open | $200 to $375 | Clean uninterrupted runs |
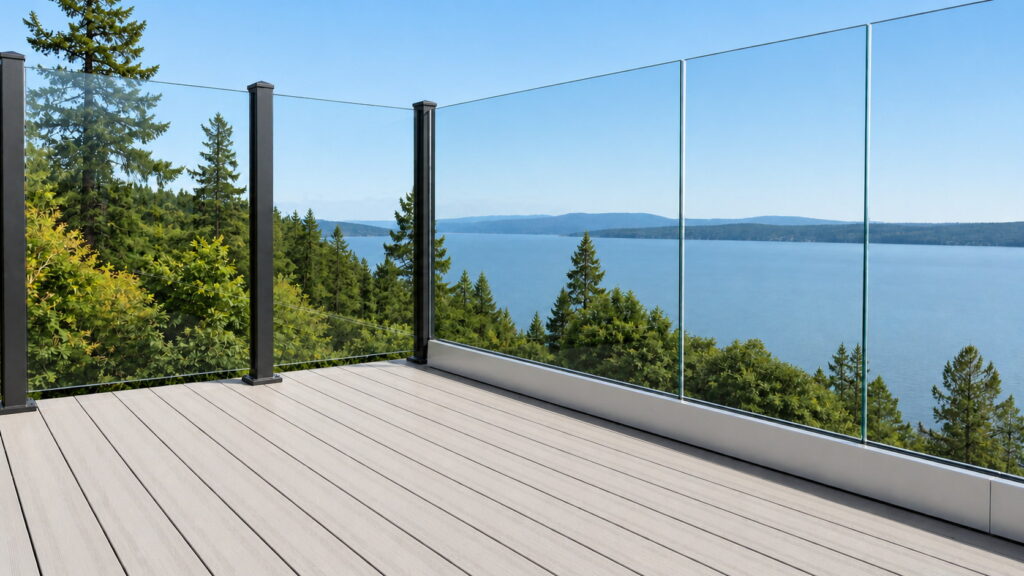
| Frameless | Glass carried by a channel or clamps, no vertical posts | Fully open | $225 to $450 | Where the view is the whole reason |
A useful way to narrow this fast: decide how much hardware you’re willing to look at. If the answer is “as little as possible,” you’re choosing between frameless, base shoe, and standoff. If you’d rather put the money elsewhere, post-supported does the same safety job for roughly half the cost.
Most Bay Area homeowners we quote land on either frameless or semi-frameless glass railings. Semi-frameless gets you close to the frameless look at a noticeably lower price, which is why it’s the most common compromise on a long deck run.
Decision 2: Which Glass
Glass choice is part style and part code, and the code half comes first.
Tempered safety glass is the baseline for railings. It’s heat-treated so it breaks into small blunt pieces rather than shards.
Laminated glass bonds two panes to an interlayer that holds the glass in place if it breaks. Code calls for it in certain configurations, most notably a guard built without a continuous top rail. If you want the cleanest frameless look with no cap across the top, this decision is made for you.
Ultra-clear low-iron glass removes the faint green cast you see at the edges of standard glass. It’s most noticeable on thicker panels and long runs.
Frosted or obscured glass gives privacy without losing light, which is worth considering on a balcony that faces a neighbor.
Tinted glass cuts glare on west and south exposures while keeping the view.
Thickness isn’t a preference. It’s set by the span, the system, and the exposure, and it goes up as the unsupported span gets longer.
Decision 3: Which Hardware and Finish
Hardware is the part you can’t swap later without pulling the glass, so it’s worth a minute of thought.
The main finishes are marine-grade stainless steel, brushed nickel, matte black, bronze anodized, and custom powder coat matched to existing exterior hardware.
If you’re anywhere near the water, specify marine-grade stainless. Standard stainless pits in salt air within a few years, and around the bay that means Sausalito, Tiburon, Alameda, and anywhere with real exposure. It’s the most common regret we see on railings installed by someone who never asked about the location.
For interior stairways the calculation is different. Salt isn’t a factor, so finish becomes purely a design decision, and matte black or brushed nickel both work well against pale treads.
Decision 4: What Code Requires Where It’s Going
A railing is a guard, and guards are regulated. The 2025 California Building Code took effect on January 1, 2026, and it governs five things on a residential glass guard:
- When a guard is required. Once a walking surface sits more than 30 inches above the surface below.
- Height and openings. Residential guards must reach 42 inches, and no opening may pass a 4-inch sphere.
- Glass type. Guard glazing must be safety glass, and a guard without a continuous top rail calls for laminated glass.
- Load. The system has to carry a 200-pound concentrated load applied outward and downward at any point along the top.
- Seismic anchoring. California guards carry seismic loads on top of the standard ones, so the anchor detail and the substrate behind it both matter.
Pool barriers follow a separate set of rules covering height, gaps, and self-closing gates. If your project is a pool enclosure rather than a deck guard, you’re working to the pool code, not the guard code, and the two are not interchangeable.
Most Bay Area jurisdictions require a permit and an inspection when a guard is added or replaced. Requirements vary by city and county.
Decision 5: What It Costs
The table above gives the range by system. Five things move the number inside that range:
- Glass thickness. Longer spans and taller panels call for thicker glass, and glass is priced by weight.
- Hardware finish. Marine-grade stainless costs more than standard, and near the water it’s the right call anyway.
- Site access. Large panels are heavy. A hillside lot or an upper-level balcony with no clear path adds labor.
- Permit and inspection. Requirements vary across the Bay Area counties.
- Substrate condition. A deck or slab that can’t carry the anchoring load needs work before the railing goes on.
That last one catches people out. Glass systems concentrate more force into fewer points than a picket railing does, so an older deck that held its original railing fine may still need framing work.
Choosing by Location
The five decisions are the same everywhere, but the weighting changes depending on where the railing goes.
Decks. The most common application, and where system choice matters most. On a hillside or water-facing deck, a picket railing cuts the view into vertical slices and glass doesn’t. Base shoe gives an uninterrupted run; standoff fittings give a lighter look with more visible hardware.
Balconies. The tightest code scrutiny of any application, because the fall height is real. Wind also matters more than people expect. A solid glass panel blocks wind while a picket railing lets it through, which is the actual reason many exposed Bay Area balconies go to glass.
Stairways. The hardest to fabricate well. Every panel is cut to the rake of the stair, so measurements have to be exact before anything is tempered. There’s no adjusting tempered glass on site. Interior stairs are also where glass earns its keep in a way photos undersell: it keeps daylight moving through the middle of a house instead of stopping it at the landing.
Pool enclosures. A different code path and a different reason for the project. The barrier exists so a child can’t reach the water unsupervised, and glass lets you keep sightlines to the pool while meeting that requirement.
Rooftop terraces. Two engineering problems at once: wind exposure at height, and anchoring into a roof assembly without compromising the waterproofing underneath.
The Downsides Worth Knowing
Glass is the most expensive of the common guard materials, and it’s the only one that looks worse when the upkeep slips. Every water spot and handprint shows, so a panel nobody cleans for a season looks neglected in a way a picket railing never does.
Three more things. Tempered glass is cut and treated before it ships, so nothing can be trimmed on site and a measuring error is an expensive one. A solid panel catches wind rather than letting it pass, which is exactly why it works as a windscreen but also means the anchoring has to carry more load. And glass is transparent by default, so on a balcony facing a neighbor you’re either choosing frosted or accepting the sightline.
If any of those weigh more heavily for you than the view does, cable or metal picket is the better call, and a good installer will tell you that at the estimate.
Frequently Asked Questions
What are the different types of glass railing systems?
Five: post-supported, semi-frameless, standoff or spigot, base shoe, and frameless. They differ in how the glass is held, which decides how much hardware is visible and what the job costs per foot.
What is the average cost per foot of glass railing?
Installed glass railings run roughly $120 to $450 per linear foot in the Bay Area. Post-supported sits at the low end, frameless at the high end.
What is the typical cost of a glass deck railing system?
For a deck, most projects land between $175 and $375 per linear foot depending on whether you choose standoff fittings or a continuous base shoe. A 30-foot run is a common size, which puts a typical deck in the $5,000 to $11,000 range installed.
What are the downsides of glass railings?
Cost and cleaning are the two real ones. Glass is the most expensive guard material and it shows water spots in a way cable and metal don’t. Beyond that, tempered glass can’t be adjusted on site, a solid panel catches wind so the anchoring works harder, and it’s transparent unless you specify frosted.
Do glass railings need a permit in California?
Usually yes. Guards are a structural safety element, and most Bay Area jurisdictions require a permit and an inspection when one is added or replaced.
How long does a glass railing installation take?
Plan on 3 to 6 weeks from signed contract to finished installation. Fabrication takes most of that time because tempered glass is cut and treated to your exact measurements. The installation itself is usually one to two days.
Choosing the Right Glass Railing System for Your Project
Work the five decisions in order and the choice makes itself: pick the system by how much hardware you want to see, let code settle the glass, let the location settle the finish, and let the substrate tell you whether there’s prep work first. The systems that look nearly identical in a photo can differ by $200 per linear foot, so the decision is worth making deliberately rather than from a product page.
Insight Glass has installed glass across the Bay Area since 1987, and we’ll walk the site, measure, check what the framing can carry, and give you a written price before anything is ordered. Have a look at the glass railing systems we install, or call (707) 746-6571 and tell us where the railing goes and roughly how long the run is.
Disclaimer: The information provided in this article is for general informational purposes only and does not constitute professional, legal, or contractor advice. Pricing estimates are based on regional averages as of the “Updated” date shown at the top of this article and may vary based on your specific project scope, glass package, hardware finish, site access, and Bay Area city. Title 24 and CBC code references are based on publicly available information and may change. Always obtain multiple written estimates from licensed contractors before making a decision. Insight Glass Inc is a licensed California contractor (License #599566). Contact us for a free on-site assessment tailored to your project.